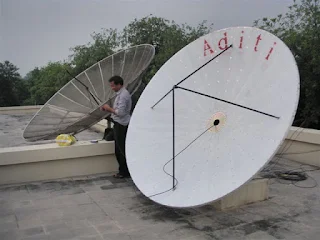
HOW to Install C-Band Dish System for Free to Air Channels
There is an important difference in the process of aiming an analog C-band TVRO and a DTH digital
dish. With C-band analog, even with a faint signal received, a hint of a television picture appears.
After Set you dish adjust the elevation and azimuth (compass heading). The dish can be rotated to the correct elevation by loosening one bolt and then reading the angle as marked on the side of the LNB support arm. This is accurate to within at least a half a degree when the pole is vertically aligned. The compass heading is set by sighting with a compass and
then by rotating the dish about its support arm by loosening the bolts behind the dish.
A database of channels is mostly pre-programmed into the satellite receiver.
Simply turn the power on, select the main menu from the remote control or front panel buttons,
select "Options," then "Setup" from the next menu, and finally tune channels from the menu.
Once the aiming angles have been manually set the receiver can be used to peak the signal.
Again select the main menu via the remote control or front panel buttons, select "Options," then "Setup"
and "Dish Pointing" from the two subsequent menus and finally "Signal Strength Meter" from the
last menu.
Most digital satellite receivers provide an on-screen signal strength meter, which show up as a
progressive vertical or horizontal bar on the TV screen. if you can also use Sat Finder meter. it is easily available on market or you can purchase on www.marginprice.in
This can also be used for fine tuning the alignment. The process involves adjusting the elevation
and then the azimuth to peak this meter.
The system requires a three second wait between each read-out on the meter to allow it to
complete its cycle. Both a graphic display and a number that varies between 0 and 99 are provided
to facilitate this process.
Once the setup has been done, sit back and auto-tune the receiver using the remote.
Most receivers will automatically tune the downlink frequencies and the other parameters, and
store these in memory.
These can also be manually tuned, by going into the setup menu as described earlier, and
manually inputting the downlink frequency of the channel you wish to watch, along with the
polarization of that transponder, the Symbol rate (SR) and the FEC.


